







Electric Steam Bottle Sterilisers and Dryers: How They Work and How to Choose
How an electric steam bottle steriliser and dryer works, how to use it safely, what health bodies in AU, UK, US and Canada say, and how to pick one.
On this page
- Key points
- What an electric steam bottle steriliser and dryer is
- Why babies need clean and sterile feeding gear
- Official advice in Australia, the UK, the US and Canada
- Electric steam vs boiling, microwave and cold water
- How to use a steam steriliser and dryer step by step
- What to look for when buying one
- Materials, BPA and microplastics
- Care, descaling and common mistakes
- When to skip the steriliser
- Frequently asked questions
- Sources
Short answer: An electric steam bottle steriliser and dryer uses hot steam to kill germs on clean baby bottles. A built-in fan then blows warm, filtered air over the bottles to dry them. You still must wash every bottle in hot, soapy water first. Steam cannot clean away dried milk.
Health advice varies slightly by country. Australia and the UK advise sterilising bottles until your baby is 12 months old. The US and Canada say daily sterilising matters most in the first months or for babies with weak immune systems.
Key points
- Wash first: Always scrub bottles, teats (nipples) and rings in hot, soapy water before sterilising.
- Steam kills germs: Hot water vapour reaches every corner of a clean bottle.
- Drying stops damp germs: Warm air dries bottles inside a closed lid, so you do not need a tea towel.
- Check heat limits: Some breast pump tubing and soft plastics melt in steam. Read the label first.
- Descale often: Hard tap water leaves white chalk on the heating plate. Clean it with vinegar or citric acid.
- Keep the lid shut: Bottles stay clean inside until you open the lid.
What an electric steam bottle steriliser and dryer is
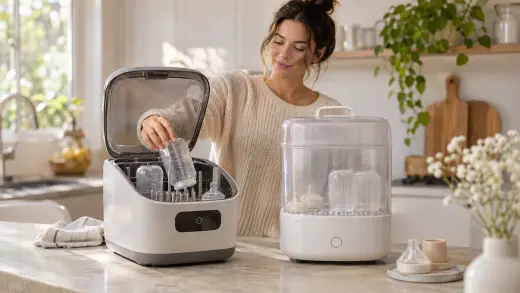
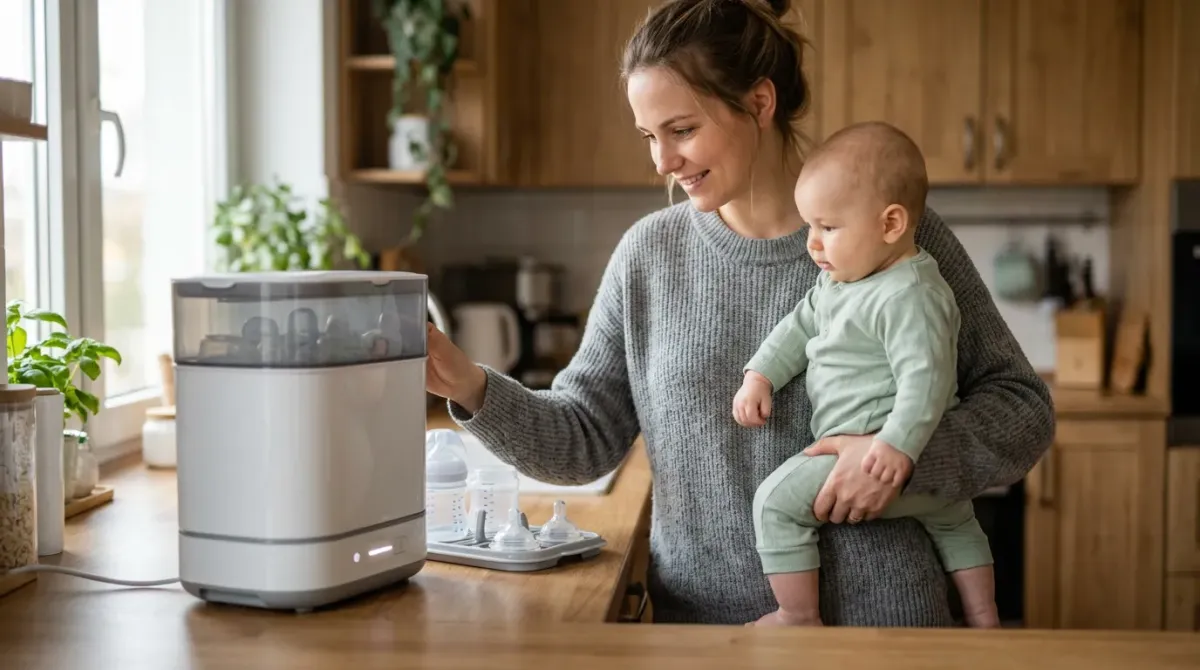
An electric steam bottle steriliser and dryer is a kitchen bench appliance. It sits on your counter and plugs into a wall socket.
It does two jobs in one machine. First, it boils a small amount of water on a metal heating plate. The boiling water turns into hot steam. The steam rises through a tall chamber and surrounds your bottles.
Second, the machine switches on a fan and a gentle heater. Warm air passes through a filter at the base. That warm air dries the wet bottles and teats.
Most models let you pick three modes. You can run steam only, dry only, or steam followed by drying. Many parents also use the closed machine as a clean storage box on the bench.
What goes inside
- Baby bottles made of glass, silicone or heat-safe plastic.
- Teats, screw rings, sealing discs and bottle caps.
- Dummies (pacifiers) that say they are safe for steam.
- Heat-safe breast pump shields, valves and collection cups.
- Small spoons and medicine syringes, if the maker says steam is safe.
What should stay out
- Long plastic breast pump tubing, which can melt or trap water.
- Electronic pump motors or battery parts.
- Wooden spoons or items with metal springs that can rust.
- Soft plastics that are not marked heat-safe.
Why babies need clean and sterile feeding gear
Newborn babies have young immune systems. Their bodies are still learning how to fight off germs. Milk is also a rich food for bacteria.
If milk sits in a bottle crack or inside a teat, germs grow fast. A sick baby can get tummy upsets, vomiting or diarrhoea. Babies under 3 months old and babies born early face the highest risk.
Washing with dish soap and a brush removes milk fat and protein. It removes most germs too. Sterilising goes one step further. High heat kills the tiny germs left behind after washing.
Drying matters as well. Wet bottles left on a damp rack can pick up mould or bacteria from the air. Drying bottles with a kitchen tea towel can transfer germs from your hands or the cloth. A built-in dryer dries bottles inside a closed space with filtered air.
Official advice in Australia, the UK, the US and Canada
Public health groups in all four countries agree on one core rule. You must wash bottles well before you sterilise them. They differ slightly on how long you need to keep sterilising.
| Country | Official bodies | Main advice on sterilising bottles |
|---|---|---|
| Australia | NHMRC, Raising Children Network, Pregnancy, Birth and Baby | Wash and sterilise all bottle-feeding gear until your baby is 12 months old. Use boiling, steam or cold-water solution. |
| United Kingdom | NHS | Sterilise all feeding equipment for at least the first 12 months. Use cold-water solution, steam or boiling. |
| United States | CDC, AAP | Sanitise daily for babies under 2 months, born early, or with weak immune systems. Older healthy babies may only need hot soapy washing or a dishwasher hot cycle. |
| Canada | Health Canada, Canadian Paediatric Society | Sterilise before first use and daily for young or vulnerable babies. Boiling for a few minutes is the standard home method, or a dishwasher sanitise cycle. |
Check the rules where you live. If your baby was born early or has a health condition, ask your doctor or child health nurse. They may tell you to sterilise for longer.
In Australia, the National Health and Medical Research Council (NHMRC) and Raising Children Network recommend sterilising until 12 months. After 12 months, babies usually drink from open cups and eat solid food. Their immune systems are stronger by then.
In the UK, the NHS gives the same 12-month rule. The NHS also notes that you should keep sterilising dummies and teats for the full first year.
In the US, the Centers for Disease Control and Prevention (CDC) says daily sanitising is key for babies under 2 months old. It is also key for babies born early or babies with weak immune systems. For older, healthy babies, the CDC says thorough washing in hot soapy water or a dishwasher is often enough.
In Canada, Caring for Kids (from the Canadian Paediatric Society) says to sterilise all bottles and teats before first use. Many Canadian clinics recommend boiling or steam sterilising in the early months. Always follow your local health nurse's advice for your baby.
Electric steam vs boiling, microwave and cold water
An electric steam steriliser and dryer is not the only way to sterilise bottles. Many families use a simple pot on the stove. Others use a microwave box or cold-water tablets. Here is how the main methods compare.
| Method | How it works | Dries bottles? | Best for | Watch out for |
|---|---|---|---|---|
| Electric steam steriliser and dryer | Heats water into steam, then blows warm filtered air | Yes, built-in | Busy daily bottle feeding and pump parts | Takes bench space and needs regular descaling |
| Boiling in a pot | Submerge clean gear in rolling boiling water | No, air-dry only | Low cost, travel or occasional use | Scald risk, hard on plastic teats over time |
| Microwave steam box | Microwave heats water inside a plastic tub | No, air-dry only | Small kitchens and quick cycles | Must fit your microwave; steam burns hands if opened fast |
| Cold-water solution | Soak clean gear in water with sterilising tablets | No, shake off and use | Camping, power cuts or no power outlet | Chemical smell; metal parts can corrode |
| Dishwasher hot cycle | Hot water and heated dry cycle | Sometimes | Older babies in US and Canada guidance | Does not replace sterilising for newborns in AU and UK |
Boiling on the stove
Boiling is cheap and needs no special gadget. You put clean bottles in a large pot of water. Make sure no air bubbles stay trapped inside. Boil for the time set by your local health guide, usually 5 minutes.
The downside is safety and time. A pot of boiling water on the front burner is a scald hazard around children. You also have to watch the stove so it does not boil dry. Boiling can wear out soft silicone teats faster too.
Microwave steam sterilisers
Microwave tubs cost less than electric machines. They take up very little cupboard space. You add water, snap on the lid, and microwave for a few minutes.
However, they do not dry the bottles. You must also check that the tub fits your microwave turntable. If the tub touches the microwave walls, it will not spin and may melt.
Cold-water tablets or liquid
Cold-water systems use a mild food-safe sanitising tablet dissolved in tap water. You submerge bottles under a floating lid so no air pockets remain. You leave them to soak for the time on the packet.
This method uses no heat and no power. It is handy when travelling or during a power outage. You should make a fresh batch of solution every 24 hours. Keep the tub out of reach of toddlers.
Why parents choose electric steam and dry
An electric machine runs on its own and turns off by itself. You do not have to stand by the stove. The drying step means bottles are ready to fill or pack right away. You do not have wet bottles sitting out on a counter rack collecting dust.
How to use a steam steriliser and dryer step by step
Using the machine the right way keeps your baby safe. Follow your own machine's manual first, as water amounts vary. Here is the standard routine.
- Wash your hands first. Use soap and warm water for at least 20 seconds. Dry your hands on a clean towel.
- Take every bottle apart. Separate the bottle, teat, collar ring and cap. Take apart breast pump valves and shields too.
- Rinse and wash in hot, soapy water. Use a clean bottle brush to scrub inside the bottle. Use a small teat brush for the narrow tip. Push water through the teat hole to clear trapped milk.
- Rinse off all soap suds. Use clean running water. Soap left on a bottle can upset a baby's tummy.
- Measure the water for the machine. Pour the exact amount into the heating plate well. Too little water stops the cycle early. Too much water can flood the fan vent.
- Load the lower basket. Stand bottles upside down with the openings facing the steam jets. Leave a little space between bottles so steam can move freely.
- Load the upper tray. Place teats, rings, caps and pump valves on the top rack. Place teats pointing down or on their sides so water does not pool inside.
- Put the lid on securely. Check that the steam vent on top is clear. Do not drape a cloth over the machine.
- Pick your cycle. Choose the sterilise-and-dry cycle for daily use. The machine will heat, steam, and then blow warm air.
- Let it cool before opening. Hot steam can burn your fingers and face. Wait until the cycle ends and the parts feel safe to touch.
- Keep parts sterile until use. Wash your hands before taking bottles out. Put the clean teat and cap straight onto the bottle, or leave everything inside with the lid shut.
Tips for hard water areas
If your tap water leaves white marks in your kettle, you have hard water. Minerals like calcium build up on the steriliser's heating plate. This buildup slows down heating and can trigger error lights.
Using distilled water or cooled boiled water helps stop scale. If you use tap water, plan to descale the plate once a week.
What to look for when buying one
Many models look alike on the shelf. Focus on features that fit your kitchen and your bottles.
Bottle capacity and shape
Think about how many bottles your baby uses in a day. Some machines hold four bottles, while others hold six or eight. Wide-neck bottles and tall glass bottles take up more room than slim plastic ones. Check the inside height if you use tall bottles.
Modular layout
Look for a two-tier or three-tier design that lets you remove the big bottle bin. When you only need to sterilise dummies or pump parts, a smaller stack uses less power and less bench space.
Air filter for the dryer
The dryer fan pulls room air into the machine. A good dryer has a fine filter at the air intake on the bottom or side. This filter traps kitchen dust and pet hair. Check if you can buy spare filters easily, or if the filter can be washed.
Bench space and cupboard height
Measure the space under your kitchen wall cupboards. Steam sterilisers are tall, and hot steam shoots out of the top vent. Do not run a steam machine directly under a low wooden cabinet. Steam can warp wood and peel paint over time.
Heating plate and controls
A flat stainless steel heating plate is easy to wipe clean. Avoid deep, narrow wells that are hard to reach with a cloth. Simple buttons with clear lights are easier to read at 2:00 AM than tiny touchscreens.
Noise level
The steam phase is quiet, like a soft kettle. The drying fan makes a steady hum, like a small hairdryer on low. If your kitchen is right next to your baby's room, a quieter fan helps.
Safety marks and electrical rules
Always buy a machine made for your country's power voltage and plug. Do not use a travel plug adapter for a high-heat appliance. Look for official electrical safety marks in your region:
- Australia and New Zealand: Look for the Regulatory Compliance Mark (a tick inside a triangle) on the label. Check Product Safety Australia for recalls.
- United Kingdom: Look for the UKCA or CE mark on the base. Buy from trusted shops, as the Office for Product Safety and Standards (OPSS) warns against unsafe unbranded imports.
- United States: Look for a trusted lab mark such as UL or ETL. Check the Consumer Product Safety Commission (CPSC) for recalls.
- Canada: Look for CSA, cUL or cETL marks. Check Health Canada's recall site before buying second-hand.
Materials, BPA and microplastics
Parents often worry about heating plastic baby gear. Knowing what your gear is made of helps you make calm choices.
BPA rules around the world
Bisphenol A (BPA) is a chemical once used to make hard clear plastic. Health agencies in Australia, the UK, the US and Canada all moved away from BPA in baby bottles years ago. Food Standards Australia New Zealand (FSANZ) notes that major makers phased out BPA in baby bottles. The US Food and Drug Administration (FDA), Health Canada and UK rules also ban or stop BPA in infant feeding bottles.
Still, check old or unbranded hand-me-down bottles. If a clear hard plastic bottle is cloudy, old or has no maker name, throw it out.
Common bottle and steriliser materials
- Polypropylene (PP): A milky, lightweight plastic. It handles steam heat well, but scratches over time.
- Silicone: Soft, flexible and heat-safe. It does not crack easily, though it can pick up soap smells if you use scented dish liquid.
- Borosilicate glass: Heavy and sturdy. It does not scratch or absorb smells. It handles steam heat well, though you should let it cool before pouring cold water in.
- Stainless steel: Used for the heating plate inside most machines, and for some baby bottles.
Reducing plastic wear
Hot water and scrubbing can slowly wear down plastic bottles. Scratched plastic can also trap tiny bits of milk. To reduce wear, use a soft sponge or soft-bristle bottle brush. Replace plastic bottles and teats if they look cloudy, cracked or sticky.
If you want to cut down on heating plastic altogether, glass or silicone bottles are simple options. They work inside electric steam sterilisers just like plastic ones.
Care, descaling and common mistakes
A steriliser and dryer works best when you keep it clean. Milk drips and hard water minerals can build up fast.
How to descale your machine
- Unplug the machine and let it cool completely.
- Mix a small amount of white vinegar and water (check your manual for the exact mix, often equal parts).
- Pour the mix onto the heating plate so it covers the scale. Do not turn the machine on unless your manual says to.
- Leave it to soak for 20 to 30 minutes until the white crust softens.
- Pour out the vinegar mix and wipe the plate with a damp cloth.
- Rinse the plate carefully without getting water into the fan vents underneath.
- Run one empty steam cycle with plain water to clear any vinegar smell.
Never use bleach, harsh scouring pads or oven cleaner on the heating plate. Never dunk the electric base in water.
Common mistakes to avoid
| Do | Don't |
|---|---|
| Wash bottles with hot soapy water first | Put milky, unwashed bottles straight into the steriliser |
| Place bottles upside down so steam enters | Stand bottles upright, which traps dirty water inside |
| Measure the exact water amount for the plate | Pour water straight from the tap over the fan vents |
| Check and clean the air filter every month | Run the dryer with a blocked, dusty filter |
| Keep the lid closed until you need a bottle | Dry wet bottles with a kitchen tea towel |
| Check pump manuals before steaming parts | Steam soft tubing or parts marked wash-only |
| Place the machine on a heat-safe open bench | Run it directly under low wooden cupboards |
When to skip the steriliser
You do not always need to run the machine for every item. Knowing when to skip it saves time and protects your gear.
Skip the steam steriliser if an item is marked "do not boil" or "do not steam". Some insulated sippy cups warp in steam heat. Most breast pump tubing should stay dry and clean, not steamed, unless milk backs up into it.
Also check your baby's age and your local rules. Once your baby passes 12 months, health bodies in Australia and the UK say normal hot soapy washing is enough. In the US and Canada, many parents switch to hot soapy washing or the dishwasher earlier for healthy, full-term babies.
You can still use the dry-only mode after washing if you like. Drying bottles with warm filtered air keeps your counter tidy.
Frequently asked questions
Do I need a bottle steriliser if I have a dishwasher?
It depends on where you live and your baby's age. In Australia and the UK, health bodies advise sterilising bottles for 12 months, because standard dishwashers may not reach or hold sterilising heat. In the US and Canada, the CDC and Health Canada say a dishwasher with a hot water and heated dry or sanitise cycle is fine for healthy babies after the first months.
How long do I need to sterilise baby bottles?
Australia's NHMRC and the UK's NHS say to sterilise all feeding gear until your baby is 12 months old. The US CDC says daily sanitising is most important for babies under 2 months, babies born early, or babies with weak immune systems. Ask your doctor or child health nurse if you are unsure.
Can I put breast pump parts in a steam steriliser and dryer?
You can put most hard plastic shields, bottles and silicone valves inside. Always check your pump manual first, because some soft parts warp at high heat. Never put the electric motor, power cord or dry air tubing in the steriliser.
Why is there white chalky buildup on the heating plate?
That white crust is mineral scale from tap water, mostly calcium and magnesium. It is harmless, but thick scale stops the plate from heating well. You can remove it by soaking the cold plate in white vinegar and water, then wiping it clean.
How long do bottles stay sterile inside the machine?
Most makers state that clean, dry bottles stay sterile inside the closed machine for up to 24 hours. That only works if you keep the lid shut. Once you lift the lid, room air enters and the items are no longer sterile.
Is it safe to use tap water in a steam steriliser?
Yes, normal drinking tap water works for making steam. The high heat turns the water into pure steam and leaves minerals behind on the plate. If you live in a hard water area, distilled or filtered water helps keep the heating plate clean.
Do I need a dryer built into the steriliser?
You do not strictly need a dryer, as clean bottles can air-dry on a clean rack. However, a built-in dryer saves time and stops water droplets from sitting inside teats. It also keeps dust and insects off your bottles while they dry.
Sources
- NHS – Sterilising baby bottles
- CDC – Infant formula preparation and storage
- Raising Children Network – Baby formula: how to make and store it
- NHMRC – Infant Feeding Guidelines
- Caring for Kids, Canadian Paediatric Society – Feeding your baby in the first year
- Food Standards Australia New Zealand – Bisphenol A (BPA)
- U.S. FDA – Bisphenol A (BPA): use in food contact application
- UK Office for Product Safety and Standards
Related guides
More Feeding & Baby Food →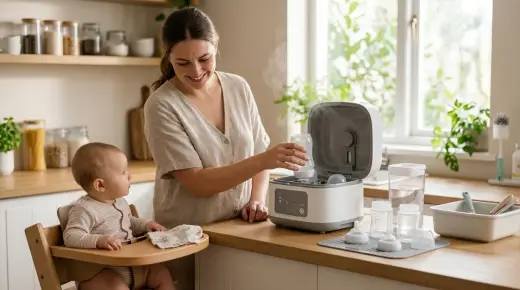
Electric Bottle Sterilisers and Dryers: How They Work, How to Choose, and Safe Use

UV-C LED Sterilisers vs Steam Microwave Bags for Baby Bottles: How They Work and Which to Choose

Electric Bottle and Food Pouch Warmers: How to Choose and Use One Safely