










How to Choose a Baby Bottle Brush: Bristles, Silicone, and Safe Cleaning
How to pick a baby bottle brush: nylon bristles, silicone, or sponge tips. Compare head shapes, safe materials, cleaning, and when to replace your brush.
On this page
- Key points
- Why a good bottle brush matters
- The three main types of bottle brushes
- Matching the brush to your bottles and teats
- Features that make daily washing easier
- Safe materials and what to check
- How to wash baby bottles and clean the brush
- Official guidance in Australia, the UK, the US and Canada
- Bottle brush needs by age stage
- When to replace your bottle brush
- Common mistakes parents make
- Frequently asked questions
- Sources
Short answer: Pick a dedicated baby bottle brush that fits the neck of your bottles and reaches every corner. Nylon bristle brushes scrub dried milk well. Silicone brushes dry fast and resist germs. Avoid sponge-tip brushes if you cannot dry them fully, because damp foam traps bacteria. Always keep one brush just for baby feeding gear, wash it after every use, and replace it as soon as the head wears out.
This advice lines up with bottle-cleaning guidance from health bodies in Australia (NHMRC and Raising Children Network), the UK (NHS), the US (CDC), and Canada (Health Canada and the Canadian Paediatric Society).
Key points
- One job only: Use your bottle brush only for baby bottles, teats, and feeding cups. Never use the kitchen dish brush.
- Brush type: Nylon bristles give a firm scrub. Silicone dries fast and is gentle on soft plastic. Sponge tips hold water and wear out quickly.
- Fit matters: Check that the head slips easily through your bottle neck without forcing it.
- Clean all parts: You also need a small brush or tool for teats (nipples), screw rings, and anti-colic vents.
- Dry upright: Shake off extra water and stand or hang the brush in open air so mould cannot grow.
- Replace often: Swap out the brush or head when bristles bend, silicone tears, or any smell lingers.
Why a good bottle brush matters
Breastmilk and infant formula both contain fats and proteins. These leave a thin, sticky film inside bottles and teats. Warm water alone will not shift that film.
If milk residue stays behind, bacteria can grow fast. A young baby's immune system is still learning to fight germs. Clean bottles protect your baby from tummy bugs and upset stomachs.
A kitchen sponge or cloth rarely reaches the bottom corners of a tall bottle. Your fingers cannot fit inside narrow necks or tiny teat tips. A proper bottle brush reaches every surface so hot, soapy water can lift away the milk film.
The right brush also protects the bottle itself. Rough scouring pads can scratch plastic bottles. Deep scratches give bacteria places to hide. Food Standards Australia New Zealand (FSANZ) also notes that wear and heat can affect plastic food containers, so gentle cleaning helps your bottles last.
The three main types of bottle brushes
Most baby bottle brushes fall into three main groups. Some brushes mix two styles, such as nylon bristles with a sponge tip. Knowing how each material works makes choosing much easier.
Nylon bristle brushes
This is the classic style with a long handle and soft plastic bristles at the end. Most have a rounded tuft of bristles at the very tip to reach the bottom corners.
- Pros: Nylon bristles are great at scrubbing off dried formula or fatty breastmilk. They reach into corners and grooves around bottle threads.
- Cons: Wet bristles take longer to dry. Milk can stick near the metal wire core if you do not rinse the brush well. Hard bristles can also scuff soft plastic bottles over time.
- Best for: Parents using glass bottles, formula, or thick feeds that leave more residue.
Silicone brushes
Silicone brushes have soft, bendy fingers made from food-grade silicone instead of thin nylon hairs. Food-grade silicone is a rubber-like material that is safe for items that touch food.
- Pros: Silicone does not soak up water, so it dries very fast. It is less likely to trap smells or grow mould. It is very gentle on plastic bottles and will not scratch them. Many silicone heads can go in the dishwasher or boiling water.
- Cons: Silicone bristles are thicker and softer than nylon. They sometimes need an extra pass to lift dried-on milk. Some silicone heads are wide and will not fit narrow-neck bottles.
- Best for: Parents who want low-maintenance hygiene, fast drying, and scratch-free care for plastic bottles.
Sponge-tip and foam brushes
These brushes have a soft foam or cellulose sponge at the end of a handle. Some traditional nylon brushes also have a small sponge plug at the very tip.
- Pros: Sponge tips are soft and quiet. They wipe smooth glass or wide plastic sides without scratching. They create lots of soap bubbles quickly.
- Cons: Sponges stay damp inside for hours. Warm, wet foam is an ideal place for bacteria and mould to grow. Sponges also tear easily against screw threads and bottle rims.
- Best for: Short trips or travel when you can replace the sponge often, or wide cups that dry out completely.
Side-by-side comparison of brush types
Use this table to compare the three main brush types for everyday baby bottle washing.
| Feature | Nylon bristle brush | Silicone brush | Sponge-tip brush |
|---|---|---|---|
| Scrubbing power | High; lifts dried milk well | Medium; good for fresh feeds | Low to medium; wipes smooth sides |
| Drying speed | Medium; shake well and air dry | Very fast; water runs straight off | Slow; stays damp inside the foam |
| Hygiene and mould risk | Medium; needs thorough rinsing | Low; non-porous surface | High; foam traps moisture and germs |
| Scratch risk on plastic | Low to medium if bristles are stiff | Very low; soft and gentle | Very low |
| Heat and dishwasher safety | Check label; some melt in high heat | Usually dishwasher and boil safe | Often breaks down in high heat |
| How long it lasts | A few weeks to a few months | Usually lasts longer before wearing out | Wears and tears quickly |
Matching the brush to your bottles and teats
A brush only works well if it fits the exact shape of your feeding gear. Before buying a brush, look at the bottles you already own.
Narrow-neck vs wide-neck bottles
Standard narrow-neck bottles have a small opening. A wide silicone head can get stuck or splash soapy water everywhere when you pull it out. Measure or check the opening width. Look for a slim brush head if you use narrow bottles.
Wide-neck bottles have a broader opening and curved shoulders. A wider, rounded brush head reaches those shoulders easily. A tiny, skinny brush can miss the upper curve of a wide bottle.
Curved, angled, and anti-colic bottles
Some bottles have an angled neck or a removable bottom vent. Others have a long internal straw or valve to reduce air bubbles. A stiff, straight brush cannot clean inside a narrow vent tube.
For anti-colic parts, you need thin pipe-cleaner style brushes. Many bottle sets include one tiny vent brush in the box. Keep that small brush in a clean spot, because regular bottle brushes cannot reach inside valves.
Teat (nipple) brushes
The bottle teat (called a nipple in the US and Canada) needs just as much care as the bottle. Milk collects inside the narrow tip where your baby sucks. A big bottle brush cannot fit inside a teat.
Look for a bottle brush that either comes with a small teat brush or stores one inside its handle. A good teat brush has a tapered shape that matches the inside of the teat without poking or tearing the tiny feeding hole. Never push a sharp wire tip through the teat hole, as that can make the milk flow too fast for your baby.
Glass vs plastic vs stainless steel bottles
- Glass bottles: Glass does not scratch easily. You can use nylon or silicone brushes without worry. Just make sure the brush handle has a coated tip so metal wire does not clink or chip the glass rim.
- Plastic bottles: Plastic is softer and can cloud or scratch over time. Soft silicone or gentle nylon bristles work best. Avoid rough scouring pads or stiff wire brushes.
- Stainless steel bottles: You cannot see inside steel bottles, so you rely on feel and smell. Choose a long brush with a full tip that sweeps the bottom corner cleanly.
Features that make daily washing easier
When you are washing six to eight bottles a day, small design details save time and wrist strain.
- Handle length: The handle should be long enough to reach the bottom of your tallest bottle while your knuckles stay clear of the soapy rim.
- Non-slip grip: Wet, soapy hands are slippery. A textured or rubberised handle stops the brush from slipping and splashing water across the bench.
- Standing or suction base: A brush that stands upright on a flat end or suction cup keeps the wet head off the sink and drying rack. Check that the suction base actually sticks to your bench, or pick a weighted stand instead.
- Hanging loop: If your sink space is tight, a loop at the end of the handle lets you hang the brush on a hook above the sink to drip dry.
- Replaceable heads: Some handles let you pop off an old brush head and click on a fresh one. This cuts down on plastic waste and saves money over the first year.
- Hidden teat brush: Some brushes twist open at the handle to hold a small teat brush inside. This is handy, though you must make sure both brushes dry before you close the handle. Trapping a wet teat brush inside a closed handle causes mould.
Safe materials and what to check
A bottle brush does not go into your baby's mouth, but it touches every surface your baby drinks from. Choosing safe, sturdy materials gives you peace of mind.
BPA-free and phthalate-free handles
Bisphenol A (BPA) and phthalates are chemicals used in some plastics. Health and food safety bodies in Australia, the UK, the US, and Canada restrict or advise against BPA in infant feeding products. Look for brushes clearly labelled BPA-free and phthalate-free.
Food-grade silicone and clean wire
If you choose a silicone brush, check that it is made from food-grade silicone. It should feel smooth and firm, with no strong chemical smell out of the packet.
If you choose a nylon bristle brush, check the metal core that holds the bristles. Stainless steel wire resists rust better than plain wire. Also check that the very tip is covered or rounded so bare wire cannot scratch your bottles.
Protecting plastic bottles from scratches
Research published in Nature Food and reviewed by food safety agencies such as FSANZ shows that heat and wear on polypropylene plastic bottles can shed tiny plastic particles into liquid. While scientists are still studying what this means for health, gentle care makes sense. Using a soft silicone or gentle nylon brush, and skipping harsh scrubbers, helps keep plastic bottle walls smooth.
How to wash baby bottles and clean the brush
Even the best brush cannot clean bottles properly if the washing steps are rushed. Here is a simple, safe routine based on advice from the NHS, CDC, and Raising Children Network.
Step-by-step bottle washing
- Wash your hands first. Use soap and warm water for at least 20 seconds, then dry with a clean towel.
- Rinse right after the feed. Run cold water through the bottle and teat as soon as your baby finishes. This stops milk fat from drying onto the plastic.
- Take every part apart. Separate the bottle, screw ring, teat, cap, and any anti-colic vents.
- Wash in hot, soapy water. Fill a clean basin or dedicated washing bowl with hot water and mild dishwashing liquid. Do not wash bottles directly in a dirty kitchen sink where raw meat or dirty dishes sit.
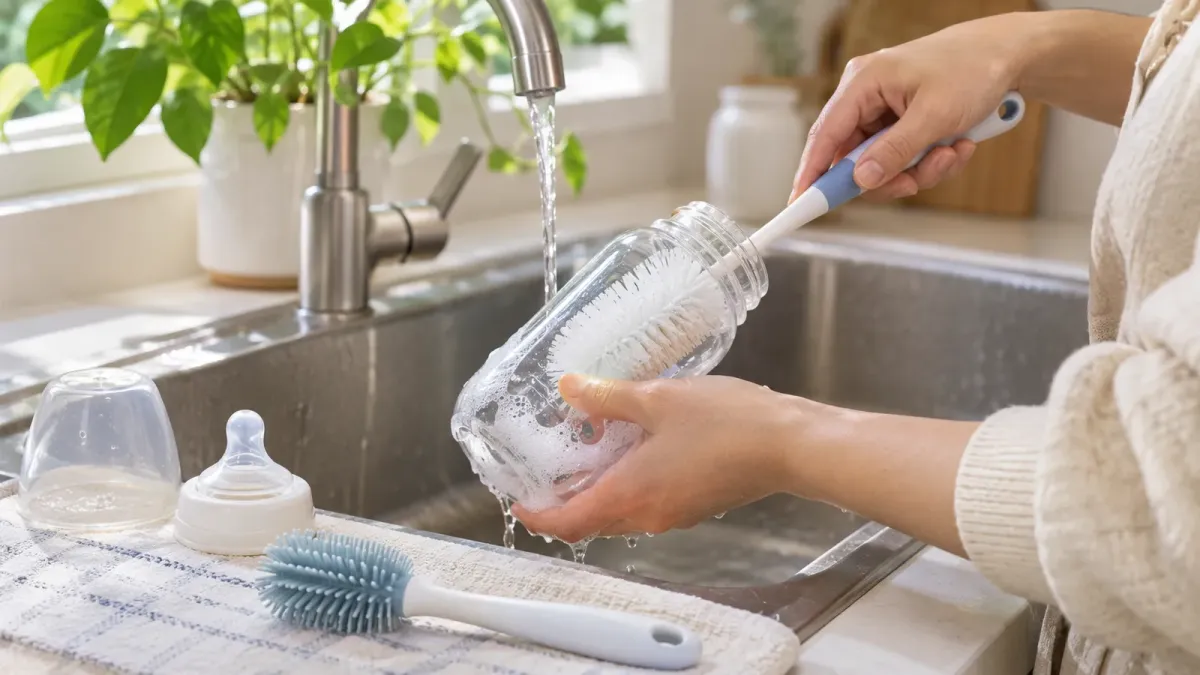
- Scrub every piece. Use your bottle brush inside the bottle and around the neck threads. Use the small teat brush inside the teat and around the rim. Squeeze soapy water through the teat hole, but do not poke wires through it.
- Rinse well. Rinse every part under clean, running drinking water until all soap bubbles are gone.
- Air dry completely. Stand bottles and parts upside down on a clean drying rack or paper towel. Do not dry them with a used tea towel, which can put germs back onto the clean plastic.
How to clean the bottle brush itself
Your bottle brush picks up milk residue every time you wash a bottle. Clean the brush after each washing session.
- Rinse the bristles or silicone head under hot running water to wash away trapped soap and milk.
- Shake out as much water as you can over the sink.
- Stand the brush upright or hang it up in open air so air reaches all sides of the head.
- If the label says it is dishwasher-safe, pop the brush on the top rack of the dishwasher every few days for a deep clean.
- For silicone brushes that are boil-safe, you can also dip the head in boiling water for a few minutes now and then. Always check the maker's heat limit first.
Do you need to sterilise the bottle brush?
Health agencies focus on sterilising the bottles, teats, and feeding parts, not the brush handle. In Australia, the UK, and the US, health advice says to sterilise bottles and teats for young babies—especially newborns, premature babies, or babies who are unwell. You can use boiling water, steam sterilisers, or sterilising tablets.
For the brush itself, thorough rinsing and full air drying after every use is the main rule. If you have a heat-safe silicone brush, you can boil the silicone head or run it through a hot dishwasher cycle when needed. Never put a foam sponge or low-heat plastic handle into a steam steriliser unless the packet says it is safe, as it can melt or warp.
Official guidance in Australia, the UK, the US and Canada
While rules vary slightly between countries, all four health systems agree on the core steps: keep baby feeding gear separate, scrub every part with a clean brush in hot soapy water, rinse well, and air dry.
| Country | Official bodies | Core bottle and brush advice |
|---|---|---|
| Australia | NHMRC, Raising Children Network, FSANZ, ACCC (Product Safety Australia) | Wash bottles and teats in hot soapy water with a clean bottle brush. Rinse well. Sterilise feeding equipment until 12 months of age. |
| United Kingdom | NHS, Office for Product Safety and Standards (OPSS) | Wash all feeding equipment in hot soapy water using a clean bottle brush and teat brush as soon as possible after feeds. Sterilise all feeding gear until at least 12 months. |
| United States | CDC, U.S. FDA, U.S. CPSC | Use a clean brush meant only for infant feeding items. Wash in a clean basin, not directly in the sink. Sanitise daily for babies under 2 months, born early, or with weak immune systems. |
| Canada | Health Canada, Canadian Paediatric Society (Caring for Kids) | Wash bottles, teats, and rings in hot soapy water with a dedicated bottle brush. Rinse and air dry on a clean towel or rack. Sterilise for newborns and vulnerable babies, and check provincial advice. |
If your baby was born early or has a health condition, ask your doctor, midwife, or child health nurse how long you should keep sterilising bottles and brushes.
Bottle brush needs by age stage
Your cleaning needs change as your baby grows from newborn feeds to toddler cups.
| Age stage | What you are washing | What brush works best |
|---|---|---|
| Newborn to 3 months | Many small bottles, slow-flow teats, and often anti-colic vents | A slim-to-medium brush that fits easily, plus a dedicated teat brush and tiny vent brush. |
| 4 to 12 months | Larger bottles, faster-flow teats, and early open or sippy cups | A longer handle for tall bottles, and a sturdy head for thicker formula or early food residue. |
| 12 months and up | Straw cups, snack pots, and toddler water bottles | A medium bottle brush plus thin straw brushes to clean inside silicone drinking straws. |
When to replace your bottle brush
A bottle brush is not built to last forever. Daily scrubbing in hot water wears down bristles and foam. Knowing when to throw a brush out keeps your baby's feeds safe.
Replace your bottle brush right away if you notice any of these signs:
- Bent or flattened bristles: If nylon bristles splay out flat, they no longer scrub the bottom corners of the bottle.
- Loose bristles or tearing silicone: Never risk a loose bristle or piece of torn silicone ending up inside a bottle or teat.
- Torn or crumbling sponge: Foam tips break down fast. Throw them out at the first tear.
- Dark spots or mould: Any black, pink, or green spots mean mould has grown. Throw the brush away and start fresh.
- A sour milk smell: If the brush still smells after a hot soapy wash, old milk fat is trapped inside it.
- Rust on the wire: If the metal core turns orange or brown, replace the brush.
As a rough habit, many families replace nylon or sponge brush heads every one to two months, and silicone brushes whenever they show wear or every few months. If you use a brush with replaceable heads, keep spare heads in the cupboard so you can swap them without delay.
Common mistakes parents make
Tired parents often fall into small habits that make bottle cleaning harder or less safe. Watch out for these common mistakes:
- Using the family dish brush: Kitchen brushes touch raw food, coffee, and greasy pans. Keep baby brushes strictly separate, maybe in a bright colour so nobody else grabs them.
- Leaving the brush in a cup of water: Sitting a wet brush in a jar or cup of stagnant water breeds germs fast. Always dry it upright in open air.
- Closing a wet teat brush inside the handle: If your brush stores a teat brush inside the handle, let both dry fully on the rack before putting them away together.
- Forgetting the bottle threads and screw ring: Milk hides in the spiral grooves at the top of the bottle. Give the rim and screw ring a quick scrub every time.
- Skipping the rinse before washing: Letting formula dry hard overnight makes scrubbing much harder. A five-second cold rinse right after the feed saves minutes of scrubbing later.
- Forcing a wide brush into a narrow bottle: Jamming a tight brush in and out splashes soapy water and bends the bristles in days.
Frequently asked questions
Can I put a baby bottle brush in the dishwasher?
Many silicone bottle brushes and some nylon brushes can go on the top rack of a dishwasher. Always check the packaging first. Some plastic handles warp in high heat, and sponge tips usually fall apart in a dishwasher. Even if you use a dishwasher, rinse trapped milk off the brush before putting it in.
Is a silicone or nylon bottle brush better?
Neither one is best for every home. Silicone is easier to keep clean because it dries fast and does not trap germs or scratch plastic bottles. Nylon bristles scrub off dried-on milk and formula faster. Some parents keep one of each: silicone for daily washes and nylon for stubborn corners.
Do I need a separate brush for bottle teats?
Yes. A full-size bottle brush cannot reach inside the tip of a teat where milk collects. A small teat brush cleans the inside safely. Many bottle brushes come with a teat brush in the same pack or tucked inside the handle.
Can I use the same brush for my own water bottles?
It is safer not to. Health bodies such as the CDC recommend keeping a brush only for baby feeding items. Adult cups and water bottles can carry germs from hands, mouths, and benchtops that you do not want near a newborn's milk.
How do I stop my bottle brush from growing mould?
Rinse all soap and milk out of the head after every wash, shake off the water, and stand or hang the brush in an airy spot to dry. Avoid sponge tips if your kitchen is humid, and never seal a damp brush inside a drawer or closed container.
Are sponge bottle brushes safe for baby bottles?
They are safe when brand new and dry, but they are the hardest type to keep clean. Wet foam holds moisture inside for hours, which lets bacteria and mould grow. If you like sponge brushes, let them dry fully between uses and replace them very often, or switch to silicone.
Do I still need to sterilise bottles if I scrub them well?
Yes, for young babies. Scrubbing with a brush and hot soapy water removes milk and surface dirt, while sterilising kills remaining germs. Health agencies in Australia and the UK advise sterilising bottles until 12 months of age. In the US and Canada, daily sanitising is especially important for babies under 2 months, babies born early, or babies with health issues.
Sources
- Raising Children Network – Baby formula: how to make and store it
- NHMRC – Infant Feeding Guidelines
- Food Standards Australia New Zealand – Bisphenol A (BPA)
- Food Standards Australia New Zealand – Microplastics in food
- NHS – Sterilising baby bottles
- CDC – Infant formula preparation and storage
- U.S. FDA – Bisphenol A (BPA): use in food contact application
- Caring for Kids (Canadian Paediatric Society) – Feeding your baby in the first year
Related guides
More Feeding & Baby Food →
How to Choose and Use a Baby Bottle Safely

How to Choose a Baby Bib: Fit, Materials, Cleaning and Safety

How to Choose a Safe, Easy-to-Clean High Chair for Your Baby