











Baby Bottle Drying Racks: How to Choose and Use One Safely
Choose a bottle drying rack that fits your kitchen, cleans easily and lets bottles air-dry fully. Simple care tips for families in four countries.
On this page
- What a bottle drying rack does
- Why families use one
- Choosing a rack for your kitchen
- Vertical, flat and other drying options
- How to set up and use a rack
- Cleaning the rack
- Keeping the drying area clean
- Choosing by age and feeding stage
- Planning a small-space drying routine
- What to check before buying
- Guidance in Australia, the UK, the US and Canada
- Common mistakes to avoid
- When to ask for help
- Frequently asked questions
- Sources and further guidance
- Sources
Short answer: A bottle drying rack gives washed bottles and feeding parts a place to air-dry. A vertical rack may take up less bench space than a wide tray. Check that it fits your bottles, comes apart for cleaning and stays steady when loaded. Wash your hands before handling clean parts. Follow local health advice for washing, sterilising and storing feeding equipment.
There is no single rack that suits every kitchen. Some families use a small rack beside the sink. Others use a clean drying area on a shelf or inside a cupboard. You may not need to buy a special rack at all. A clean dish rack can work if it keeps baby items apart from dirty dishes.
What a bottle drying rack does
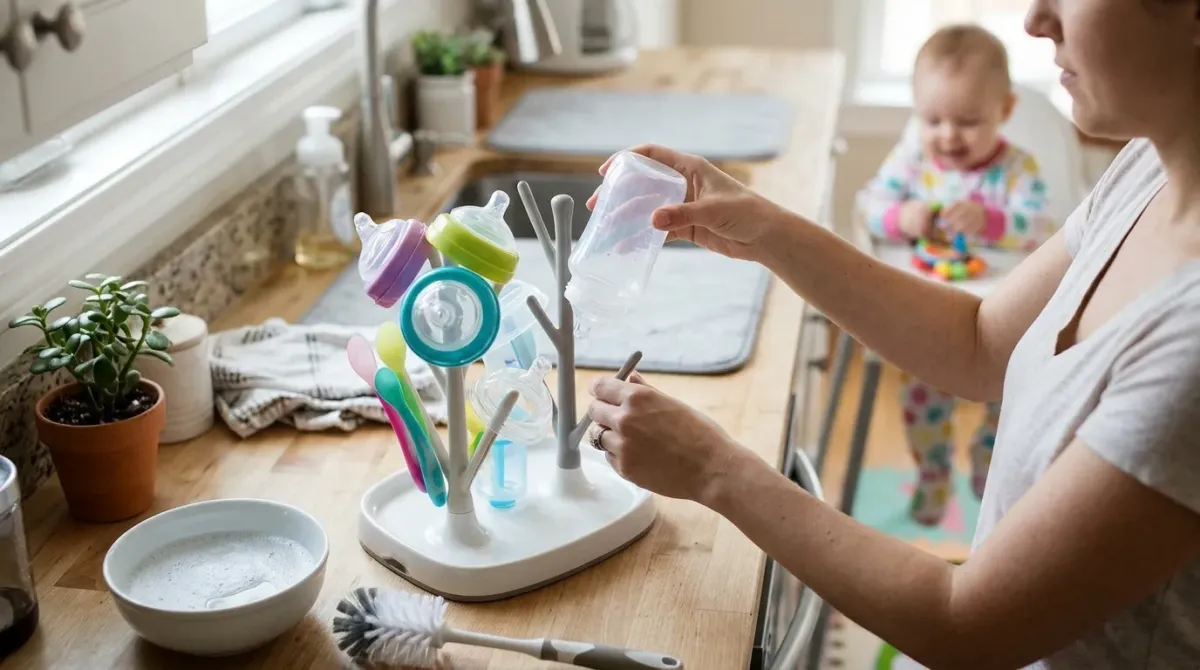
A drying rack holds washed bottles and feeding parts while water drains away. Air can reach more of the surfaces than when parts sit in a pile. This helps them dry before storage or use.
A rack does not clean or sterilise equipment. Wash bottles and parts as advised by your local health service. Sterilise them when your local guidance or your baby's care team recommends it. Drying is a separate step.
Vertical racks often have a base and upright pegs, arms or branches. Bottles and parts sit on these supports. Some models have a tray beneath them to catch water. Others need to sit over a sink or on a washable surface.
Designs vary. A rack may hold bottles upside down, while smaller parts rest on short pegs. Check the instructions for the right way to place each item. Do not assume that every bottle fits every rack.
Why families use one
A separate place for clean feeding parts can make the kitchen easier to manage. It can also keep those parts away from food scraps, used cloths and dirty dishes. That matters most when the kitchen is busy or shared.
A vertical rack may use less bench space than a broad, flat rack. But the base still needs a stable place. Measure the space you have before buying one. Include room to lift bottles off without knocking nearby items.
Some parents like having bottles and parts in one spot. That can make it easier to see what has dried. It can also help other carers follow the same routine. Clear storage habits matter more than a particular rack shape.
A rack can also help prevent parts from being left on a wet cloth. A wet surface may slow drying. It may also be harder to keep clean if it stays damp.
Choosing a rack for your kitchen
Start with the space you can spare. Measure the counter, shelf or sink area. Think about how much room you need to prepare food and wash dishes. A rack should not block the tap or make the sink hard to use.
Next, check the parts you need to dry. These may include bottles, teats, rings, caps, valves and pump parts. The rack should hold them apart, without crowding. Follow the instructions for any parts that need a special position.
- Size: Check the rack's height and base width. Make sure it fits the space you measured.
- Stability: Look for a base that sits flat. A loaded rack should not tip easily during normal use.
- Drainage: Check where water goes. A removable tray can be easier to empty and wash.
- Cleaning: See whether pegs, branches and trays can be removed. Check the maker's cleaning instructions.
- Capacity: Count the bottles and small parts you usually wash at one time. A rack should hold them without stacking.
- Fit: Compare the rack's supports with your bottle shape and pump parts. Check the maker's size guidance.
- Storage: If you need to put it away, check whether it folds or comes apart. Make sure every part can dry fully.
Do not rely on a safety badge or broad marketing claim for a drying rack. The old post claimed that a rack needed infant safety certification. That claim does not fit this kitchen accessory. Ask the maker about materials or cleaning only when the answer matters to you.
Claims such as “BPA-free” do not tell you how to clean a rack. They also do not prove that a rack dries bottles faster. Choose based on fit, stability, drainage and care instructions.
Vertical, flat and other drying options
A vertical rack can suit a narrow counter. A flat rack can give larger parts more room. A clean dish rack may be enough if it is used only for clean baby items. Each option needs a clean place and a way for water to drain.
| Option | Space and layout | Things to check | May suit |
|---|---|---|---|
| Vertical rack | Uses a smaller floor area, but can be tall. | Stability, height, peg spacing and tray cleaning. | A narrow bench or a family with several small parts. |
| Flat rack | Needs more counter width, but spreads parts out. | Drainage, surface cleaning and room around each item. | A wider worktop or bulky pump parts. |
| Clean dish rack | Uses existing kitchen space and may not need another purchase. | Keep baby parts apart from dirty dishes. Clean the rack first. | A home with a suitable rack and a clear routine. |
| Clean drying mat | Can be stored away, but stays in contact with items. | Wash and dry the mat as directed. Avoid leaving it damp. | Occasional use or a kitchen with little permanent space. |
No option is automatically cleaner. The important steps are washing the equipment, keeping it in a clean area, allowing it to dry and storing it safely.
How to set up and use a rack
- Choose a clean spot. Keep the rack away from raw food, rubbish and splashes from dirty dishes.
- Wash your hands. Use soap and water before handling washed feeding parts.
- Wash the equipment. Follow the bottle and pump makers' directions. Use your local health service's advice for cleaning feeding equipment.
- Rinse when directed. Some instructions call for rinsing after washing. Follow the directions for your equipment and cleaning method.
- Place parts apart. Set bottles and small pieces on the rack as its instructions show. Avoid piling them together.
- Let everything dry. Give air room to reach the parts. Do not use a tea towel to dry clean feeding parts unless official advice says to.
- Store dry items safely. Once dry, put them in a clean, closed place if your local guidance recommends that.
- Empty and clean the rack. Remove standing water. Wash the tray and rack as the maker directs.
Some families sterilise feeding equipment. Advice can depend on the baby's age, health and local guidance. Ask your doctor, midwife, nurse or public health service if you are unsure. Premature or unwell babies may need special advice.
Cleaning the rack
A rack can collect water, milk drops, dust and kitchen grime. Clean it as often as needed, and follow its care instructions. A removable tray is easier to empty when water gathers there.
Take the rack apart if the maker says it is safe to do so. Wash each piece with the stated method. Rinse if directed. Let all parts dry before putting them back together or storing them.
Do not use a cleaning product that could leave residue on parts that touch feeding equipment. Read the rack instructions and the cleaning product label. If the rack has cracks, rough edges or hard-to-clean joins, replace it.
Do not assume that a rack is dishwasher-safe. Heat may damage some materials. Check the maker's directions first.
Keeping the drying area clean
Place the rack away from splashes and clutter. Keep it clear of used sponges, cloths and dirty plates. Wash hands before touching clean bottles and parts.
Do not place clean feeding parts directly on a counter. Keep them on the clean rack or another clean surface made for drying. If the rack tray is full of water, empty and clean it.
Keep pets away from the drying area. Do not let children play with clean feeding parts. Put small parts away where a young child cannot reach them.
If the kitchen is shared, label or set aside a clean area. This can help other people know which parts are washed. A simple routine is easier to follow than a complicated setup.
Choosing by age and feeding stage
A rack's usefulness may change as your baby grows. The cleaning advice can also change with your baby's needs. Follow current guidance from a health professional or public health service.
| Stage | What may need drying | Useful checks |
|---|---|---|
| Newborn weeks | Bottles or expressed milk parts, if used. | Ask your care team about washing, sterilising and storage for your baby. |
| First months | Bottles, teats, caps and pump parts. | Check that small parts have room to dry and do not fall through the rack. |
| Starting other feeds | Some families still use bottles alongside cups and feeding tools. | Keep the rack suitable for the items you still use. Clean other tools as directed. |
| Later infancy | Fewer bottles may be needed, depending on the child's feeding routine. | Consider whether a smaller rack or existing clean dish rack is enough. |
These stages are broad examples. Babies feed in different ways. Follow your baby's feeding plan and the advice that applies to your family.
Planning a small-space drying routine
A small kitchen can still have a clear drying routine. First, choose one spot that stays clean and is easy to reach. It might be beside the sink or on a clear shelf. Keep it away from food preparation and dirty dishes.
Next, decide how clean parts move through the area. Wash them, place them on the rack, and leave space around each piece. When everything is dry, move it to clean storage if your local advice recommends storage. Then empty the tray and wipe the area as needed.
If the rack is tall, check overhead shelves and cupboards. Make sure you can lift bottles off without hitting a shelf. If the rack sits near the edge, move it back to a stable spot. Do not balance it on a narrow ledge.
A folding rack can be useful when the bench must be cleared. But folded parts also need a clean, dry storage place. Avoid putting away a damp rack inside a closed cupboard. Moisture can remain between pieces.
Some families use a clean tray inside a cupboard. This can keep items away from kitchen traffic. The cupboard must be clean and dry. Make sure bottles do not touch unwashed items stored nearby.
Keep the routine simple enough for every carer to follow. A small note beside the sink can explain where clean parts go. This is useful when relatives or other carers help with feeds.
What to check before buying
Read the product details and care instructions before you buy. Check the rack's measurements against your space. Look for clear instructions about assembly, cleaning and water drainage.
Think about the parts you use most. A rack with many short pegs may suit small parts. Taller supports may suit larger bottles. If you use a breast pump, check whether its parts can sit securely on the rack.
Consider how you will empty water. A removable tray may be easier to wash. A rack without a tray may need a sink-side position. Check that the water will not pool on a surface that is hard to clean.
Look at the joins and corners. Smooth, accessible parts are often easier to wash than narrow gaps. Check whether the rack comes apart for cleaning. If instructions are missing or unclear, ask the seller or maker before use.
There is no need to pay for features you will not use. A plain rack can be enough if it holds your items safely and is easy to clean. A larger rack may take more room than your routine needs.
Guidance in Australia, the UK, the US and Canada
Advice about feeding equipment comes from health services and child health experts. A drying rack itself is not a substitute for that advice. Use the guidance for your country and ask a health professional when your baby needs extra care.
| Country | Official or expert body | How it relates to this guide |
|---|---|---|
| Australia | Pregnancy, Birth and Baby; the National Health and Medical Research Council. | Use their infant feeding and food preparation advice. Ask your care team about your baby's needs. |
| United Kingdom | NHS. | Follow NHS advice for making formula and sterilising bottles. |
| United States | Centers for Disease Control and Prevention. | Follow CDC advice for formula preparation and storage. |
| Canada | Canadian Paediatric Society, through Caring for Kids. | Use its feeding guidance and ask your health provider about local advice. |
Guidance may differ by baby and location. This article does not set a sterilising schedule. Check your local health service's current instructions.
Common mistakes to avoid
- Buying before measuring: A rack can be too tall for a shelf or too wide for a narrow bench. Measure first.
- Overloading it: Crowded parts may not dry well. Use another clean space if needed.
- Leaving water in the tray: Empty it and clean the tray. Do not let water sit there.
- Mixing clean and dirty dishes: Keep washed baby parts separate from used plates and utensils.
- Using a damp cloth to finish drying: Let parts air-dry. Follow local guidance and equipment instructions.
- Assuming every rack is dishwasher-safe: Check the care label or maker's instructions.
- Believing unsupported claims: A rack does not stop bacteria by itself. Proper washing and drying matter.
- Using a damaged rack: Cracks and rough joins can be hard to clean. Replace a rack that cannot be cleaned well.
- Forgetting small parts: Keep teats, valves and caps in a place where they cannot fall onto a dirty surface.
- Following old advice without checking: Health guidance can change. Use current advice from your local health service.
When to ask for help
Ask a midwife, nurse, doctor or feeding specialist if you are unsure how to clean equipment. This is especially useful when your baby was born early, has a health condition or is receiving care in hospital.
Ask for help if feeding is painful, your baby is not feeding as expected, or you are worried about illness. A rack cannot answer those questions. Your care team can give advice for your baby.
Frequently asked questions
Do I need a special baby bottle drying rack?
No. You need a clean place where washed parts can air-dry. A separate rack can help keep them apart from dishes. A clean dish rack may work if it suits your routine.
Are vertical racks more hygienic than flat racks?
Not by shape alone. Clean the rack and let parts dry with space around them. Keep clean feeding equipment away from dirty dishes and kitchen mess.
Can I put bottles on a tea towel?
Follow your local health advice and the bottle maker's directions. A rack lets air reach more surfaces. Do not use a cloth to wipe clean parts unless your health service advises it.
Should I sterilise bottles after every feed?
Advice depends on your baby and your location. Follow current guidance from your health service or care team. Ask them if your baby was born early or has health needs.
Can I put my rack in the dishwasher?
Only if its maker says it is safe. Check the care instructions first. Some materials may warp or wear with heat.
How often should I clean the rack?
Follow the maker's directions. Empty water when it gathers. Clean the rack and tray often enough to keep the drying area clean, and let them dry fully.
Does air-drying make bottles sterile?
No. Drying does not sterilise equipment. Wash and sterilise parts when your local health guidance or care team advises it.
What if my kitchen has almost no counter space?
Measure a shelf or sink-side area and look for a rack that fits safely. You can also use a clean dish rack if it keeps feeding parts separate. Avoid placing clean parts where they can be splashed.
Can I dry pump parts on the same rack?
Check the pump maker's cleaning instructions. If the parts can air-dry, place them with space around them. Keep them separate from dirty dishes and other items.
Sources and further guidance
- Pregnancy, Birth and Baby – Food preparation and safety
- NHMRC – Infant Feeding Guidelines
- NHS – Sterilising baby bottles
- CDC – Infant formula preparation and storage
- Caring for Kids – Feeding your baby in the first year
This article provides general information only. It does not replace advice from your doctor, nurse, midwife or other health professional. Follow the instructions for your feeding equipment and your local health service. BabyGearFinder may earn a commission from qualifying affiliate links. This does not change the price you pay.
Sources
Related guides
More Feeding & Baby Food →
How to Choose and Use a Baby Bottle Safely

Baby Snack Catchers: How to Choose and Use One Safely

How to Choose a Bottle Drying Rack for a Cleaner, Tidier Kitchen
